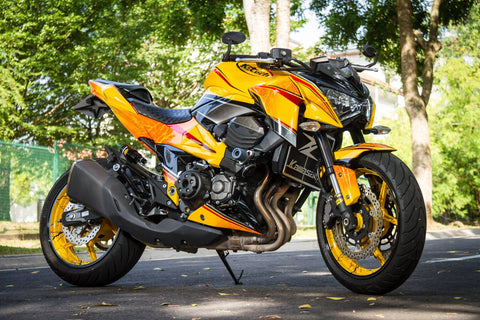
How to Properly Apply Stickers Onto Your Motorcycle


You just received your new set of stickers. The problem is, you have to apply the stickers by yourself, and if there’s anything you know about stickers, it’s that you only get one shot at applying them onto your desired surface properly, or you’re gonna screw up and have to throw them out! Let’s talk about steps you can take to reduce the possibility of screwing up.
Items you will need
- Any cleaning solution. Soap and water will suffice.
- A rag or cloth
- Masking tape (optional)
- A small squeegee or old credit card or anything of that sort
- A safety pin or needle
- Clear protect tape (optional)
Step 1: Cleaning the Surface Area
First, use a dry cloth to remove any loose debris. Next, clean the surface area with your prepared cleaning solution. Wipe off any dirt, oil, or whatever foreign residue that has come loose from using the cleaning solution. Lastly, wipe the surface clean with a dry cloth. Make sure the area is completely dry and clean.
Step 2: Applying the Sticker
Hold up the stickers to the desired area and use masking tape to mark the area (optional). Don’t rush into peeling the sticker because you only get one shot, remember? Repositioning the sticker may cause the adhesive to lose its stickiness. Peel the sticker from the backing paper halfway through, position the sticker over the surface, and press it gently on the surface with your fingers and smoothen it out. If you are going to peel the entire sticker beforehand, we recommend using masking tape as a transfer tape, to transfer the sticker without using your fingers.
Step 3: Smoothing Out and Removing Air Bubbles
If you have used a transfer tape, before removing it, be sure to smoothen the sticker with a squeegee or old credit card. If you used your finger to apply the sticker into position, still use a squeegee or credit card to gently smoothen it. Press firmly but gently and push any air bubbles present out from underneath the sticker. Carefully peel the transfer tape while ensuring no edges are lifted along the process.
Step 4: Letting the Sticker Set in Position
Leave the sticker overnight for the sticker to set in, check from time to time if any air bubbles are forming. Don’t wash the area immediately after application. For good measure, try to wait at least 3 days before cleaning. If more air bubbles are visible, push them out with the same method immediately. If the air bubbles seem to be trapped and there is absolutely no way of getting them out, use a safety pin or needle to puncture the air bubble and gently push the air out with your fingers. Note that this may damage your sticker, so be very careful about it. If you think it’s not necessary, don’t do it.
Step 5: Applying a Clear Protective Tape (Optional)
An optional step for added safety in case your bike is parked outdoors and exposed to potential damage. Applying a layer of clear protective tape is mainly to prevent the sharp edges from lifting, and to protect the sticker itself. Apply the tape, and again gently smoothen it out and ensure that air bubbles are completely pushed out. There are various kinds of protective tape, so choose the one suitable to your use - whether you want to leave it on, or remove it once the sticker is set in position. For the purpose of neatness, you may cut the tape in an outline following the shape of your sticker.